Halloween is coming up and we could not be more excited at our house. Friday Disneyland will officially be decorated for Halloween and we cannot wait to see it.
While waiting to find the piece I need to complete my first outfit tutorial I thought we could make a simple Halloween craft that cost us about $5 to make.
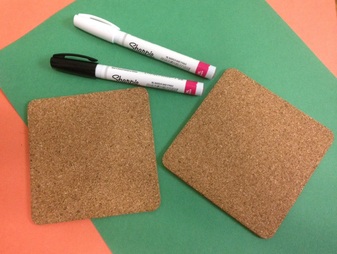
We live in a small apartment so it is hard sometimes to really decorate and get into the spirit of the holidays. I thought a great way to add some Halloween decorations to our apartment was to create some new coasters.
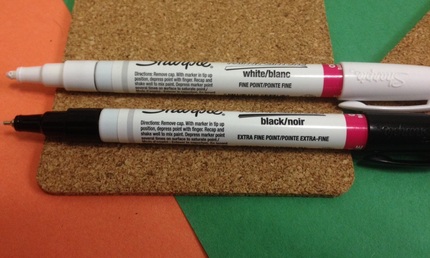
Si, my son, and I went to the craft store to pick out what items we would need. We bought a pack of 6 cork coasters and 2 sharpie paint pens.
tip.
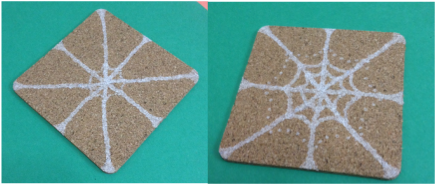
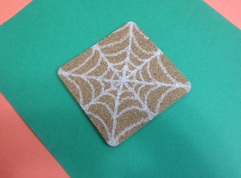
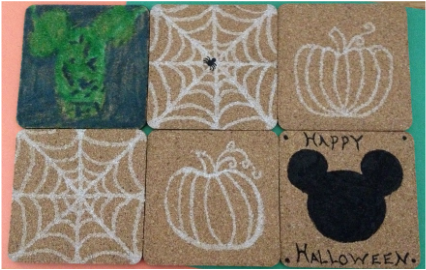
I started out by making spider webs. I love doing spider webs hey look really neat and are very simple to create. To make one you start with a basic line that goes from corner to corner, bottom to top, and side to side.

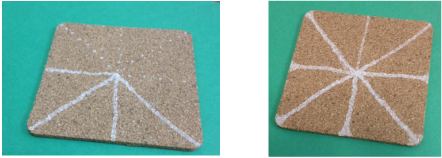
Once I have all my lines in place, I then like to fan out the ends of them to give it more character. I, then, start dotting out U shapes between the lines.
Once my webs were finished, I started making pumpkins. I made simple pumpkins, but you could make jack-o-lanterns. I was looking to keep mine simple. Just like the webs, I dotted my shapes before making solid lines. this gives you more flexibility with lines and is more forgiving towards mistakes.
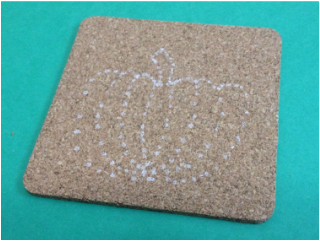
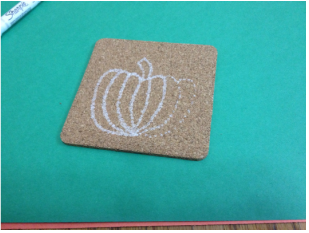
I started this one by dotting out the middle section and then building large curvy candy cane shapes for the other sections. I then added the stem to the top. When I started to see the shapes I wanted, I began doing small light pen strokes to create the solid lines.
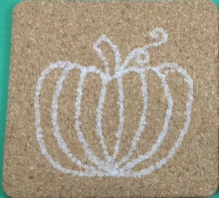
Once all the lines were what I wanted I decided make another one with a slightly different shape. I created a circle with a concave top. From there I made the sections of the pumpkin. Remember just like the webs, pumpkins are rarely ever a perfect shape. So have fun with it and always remember pumpkins also have a flat spot from when they were growing.
 |  |
I wanted to add that Sharpie makes color paint pens so you can make your coasters colorful if you wanted to.
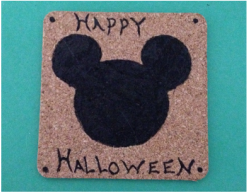
With those done, Si and I started working on our Mickeys. I decided to make a basic Mickey head silhouette and Si decided to make a two sided coaster with scary Mickeys. Here is Si working on his and his finished product. The top one is Frankenstein Mickey and the bottom one is scary Mickey.
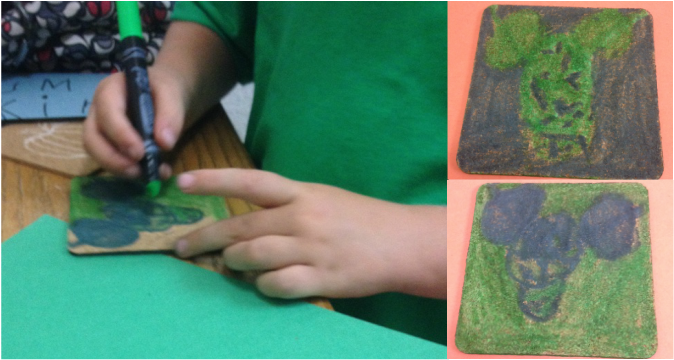
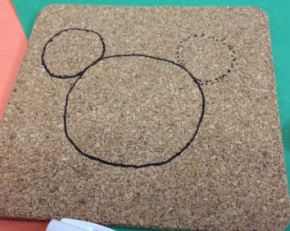
I did this all by hand without a guide, but you could use the bottom of a cup and quarters as guides. The extra fine line was great for the outline, but as I started trying to fill in the silhouette I found it to be VERY difficult. I went back to the store and bought the fine tip one and it was much smoother sailing from there. I used the same idea filling in as I did with the outlining - lots of dots that eventually fill his head all in.
To finish them, you should wait at least 24 hours to let the paint set, or pen in Si's case. Then seal them using 2 coats of mod podge or any type of sealant you have on hand.
And that is it! It took about an hour to make them and then about 3 minutes to seal them. We had so much fun making them and hope that you will too.

 RSS Feed